Hello world! :^)
I recently went through the process of compiling a custom Android kernel for my OnePlus 6T. I wanted to add some debug instrumentation to the Qualcomm WLAN driver for security research, and that meant building the kernel from source, flashing it, and setting up a workflow where I could iterate quickly. This post covers everything I learned along the way.
The device I used is a OnePlus 6T (codename “fajita”), which runs a Qualcomm SDM845 (Snapdragon 845) SoC with a 4.9.x Linux kernel. The same general approach should work for other OnePlus SDM845 devices (like the OnePlus 6, codename “enchilada”) and with some adaptation for other Android phones.
Pre-requisites
- A OnePlus 6T (or 6) with an unlocked bootloader
- A custom recovery (TWRP) installed on the device. If you do not have TWRP, you can flash it via fastboot. Grab the latest TWRP image for your device from twrp.me, reboot into fastboot mode (
adb reboot bootloader), and runfastboot flash recovery twrp.img. Then reboot into recovery by holding Volume Down + Power. - A Linux machine for building. I used WSL2 on Windows with Ubuntu 22.04, and it worked fine with a few quirks that I will mention along the way.
- About 20 GB of free disk space
adbandfastbootinstalled. If you are on WSL2, you need to use the Windows versions (adb.exeandfastboot.exe) because WSL2 cannot access USB devices directly. Make sure you also have the Google USB driver installed on Windows, otherwise fastboot will not detect your device (even if adb works fine - they use different USB interfaces).
Choosing the right kernel source
This part cost me a lot of time, so let me save you the trouble.
My device was running OxygenOS (the stock OnePlus ROM), so my first instinct was to grab the kernel source from OnePlusOSS. OnePlus publishes their kernel source to comply with the GPL, but the release is incomplete. Entire directories are missing (drivers/oneplus/ and its subdirectories), header files are absent, and the build is riddled with undefined references. You can stub things out and get it to compile, but it is a painful experience and the result may not match your running firmware.
I also tried the LineageOS lineage-17.1 kernel tree, which is well maintained and compiles cleanly. But I was still running OxygenOS, and a LineageOS kernel will not boot on OxygenOS - the userspace expectations are different and the kernel panics before it even gets far enough to log anything.
The lesson: the kernel source must match the ROM you are running. LineageOS kernel for LineageOS, OxygenOS kernel for OxygenOS. Do not mix them.
So I installed LineageOS 22.2 (Android 15) on my device and used the matching kernel source from the lineage-22.2 branch. Everything worked.
Part 1 - Install LineageOS 22.2
Download
Head to the official LineageOS downloads page for fajita and grab all four files from the latest build:
lineage-22.2-YYYYMMDD-nightly-fajita-signed.zip- the ROM itselfboot.img- the stock LineageOS kernel imagedtbo.img- device tree blob overlayvbmeta.img- verified boot metadata
Flash vbmeta and dtbo
Before flashing a custom ROM, you need to deal with Android Verified Boot (AVB). AVB is a security feature that checks the integrity of the boot and system partitions on every boot. If the signature does not match (which it will not, since we are flashing a third-party ROM), the device refuses to boot. The --disable-verity flag tells the bootloader to stop checking partition integrity, and --disable-verification disables signature verification of the vbmeta image itself.
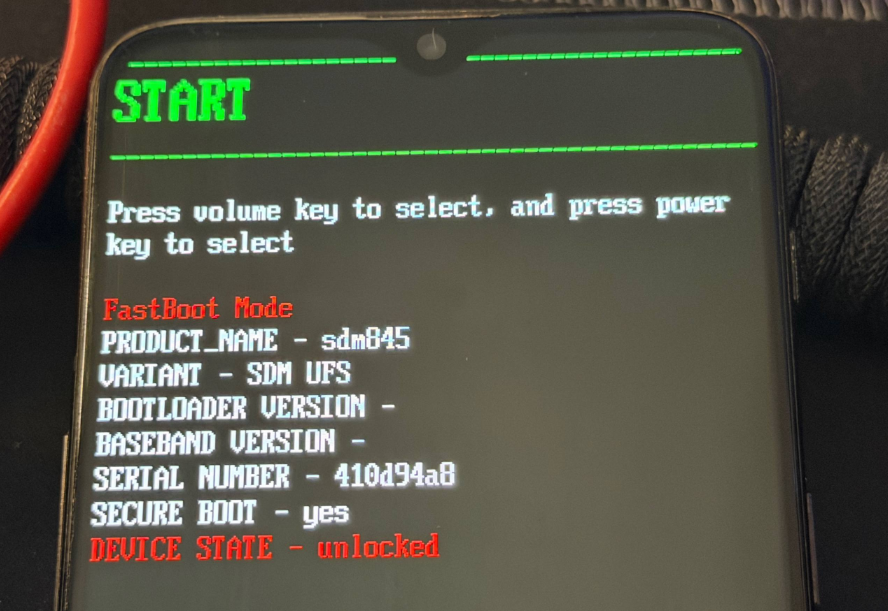
Reboot into fastboot mode and flash:
adb reboot bootloaderThis will get you to:
Then, run:
fastboot --disable-verity --disable-verification flash vbmeta vbmeta.img
fastboot flash dtbo dtbo.img
The first command flashes the vbmeta image with AVB checks disabled. The second flashes the device tree overlay, which describes the hardware configuration.
NOTE
If your version of fastboot does not support
--disable-verity, try just flashing it without the flagsfastboot flash vbmeta vbmeta.img. The LineageOS-providedvbmeta.imgis usually already patched to disable verification, so this often works too.
Now reboot. If your fastboot supports fastboot reboot recovery, use that. Otherwise, reboot and immediately hold Volume Down + Power to get into TWRP.
Flash the ROM via TWRP
If your data partition is encrypted (you will know because adb push fails with “Required key not available”), you need to format it first. In TWRP, go to Wipe then Format Data and type yes. Then reboot back into TWRP (Reboot then Recovery) so it can see the partition properly.
Now push the ROM zip to the device. This takes a few minutes since the file is about 1 GB:
adb push lineage-22.2-*-fajita-signed.zip /sdcard/In TWRP, follow these steps:
- Wipe then → Advanced Wipe - select Dalvik/ART Cache, System, Data, Cache, and Vendor. Swipe to wipe.
- Install - select the LineageOS zip you just pushed. Swipe to flash.
- When it finishes, tap Reboot. The OnePlus 6T is an A/B device, meaning it has two copies of every partition (slot A and slot B). LineageOS flashes to the inactive slot. If TWRP shows “Current slot: A” at the bottom, tap Slot B before tapping System to make sure you boot into the newly flashed slot.
The first boot takes a few minutes. Do not worry if it sits on the LineageOS boot animation for a while.
Once it boots, verify everything looks right. This should print something like 22.2-20260331-NIGHTLY-fajita:
adb shell getprop ro.lineage.versionAlso check which slot you booted into. This should say _b - remember this, you will need to flash your custom kernel to the same slot later:
adb shell getprop ro.boot.slot_suffixRoot with Magisk
We need root access to read kernel logs (dmesg) after flashing our custom kernel. Without root, /sys/fs/pstore/ and dmesg are not accessible on Android.
-
Download the latest Magisk APK from the Magisk releases page.
-
Install it on the device:
adb install Magisk-*.apk- Push the stock LineageOS
boot.img(the one you downloaded earlier) to the phone so Magisk can patch it:
adb push boot.img /sdcard/Download/-
Open Magisk on the phone, tap Install, then Select and Patch a File, and pick the
boot.imgfrom Downloads. -
Magisk creates a patched image. Pull it back and flash it:
adb pull /sdcard/Download/magisk_patched-*.img ./magisk_boot.img
adb reboot bootloader
fastboot flash boot_b magisk_boot.img
fastboot reboot- After reboot, verify root works. You should see
uid=0(root):
adb shell su -c "id"Keep the magisk_boot.img file around. We will need its ramdisk later to maintain root access when flashing our custom kernel.
Part 2 - Build and flash a custom kernel
Install build dependencies
Install the packages needed to compile an ARM64 Linux kernel. clang is the compiler we will use (matching how LineageOS builds it), and gcc-aarch64-linux-gnu provides the cross-compile toolchain that clang relies on for linking and assembling:
sudo apt update
sudo apt install -y build-essential bc bison flex libssl-dev \
    libelf-dev cpio zip unzip git wget clang gcc-aarch64-linux-gnu
Get the kernel source
Clone the LineageOS kernel tree for SDM845 devices. Make sure you use the branch that matches your installed LineageOS version:
git clone --depth 1 -b lineage-22.2 \
    https://github.com/LineageOS/android_kernel_oneplus_sdm845.git \
    lineage22_kernel_sdm845
cd lineage22_kernel_sdm845
Get boot image tools
Android boot images have a specific format. They are not just a raw kernel binary - they contain the kernel, a ramdisk (initial filesystem), the kernel command line, and various offsets and metadata, all packed together in a particular layout. To work with these images, we need two tools:
unpack_bootimg.pytakes an existing boot.img and extracts its components (kernel, ramdisk, command line, offsets, etc.)mkbootimg.pytakes those components and packs them back into a boot.img
We will use unpack_bootimg.py to extract the ramdisk from our Magisk-patched boot image (so our custom kernel keeps root access), and mkbootimg.py to combine our newly compiled kernel with that ramdisk into a flashable image.
cd ~/sidequest/qualcomm
git clone --depth 1 \
    https://android.googlesource.com/platform/system/tools/mkbootimg \
    mkbootimg_tools
Unpack the Magisk boot image
We want our custom kernel to boot with root access, so we use the ramdisk from the Magisk-patched boot image rather than the stock one. The ramdisk is the initial filesystem that the kernel mounts at boot - it contains init and the early boot scripts. Magisk patches this ramdisk to inject its su binary.
cd ~/sidequest/qualcomm/lineage22_kernel_sdm845
mkdir -p magisk_boot_unpacked
python3 ../mkbootimg_tools/unpack_bootimg.py \
    --boot_img magisk_boot.img \
    --out magisk_boot_unpacked
This prints out all the metadata from the boot image (kernel offsets, page size, command line, OS version, etc.). Take note of these values - we will need them later when repacking.
Set up environment variables
The kernel build system needs to know what architecture we are targeting and what compiler to use:
export ARCH=arm64
export SUBARCH=arm64
export CROSS_COMPILE=aarch64-linux-gnu-
export CC=clang
export CLANG_TRIPLE=aarch64-linux-gnu-
Here is what each variable does:
ARCH=arm64tells the kernel build system we are building for the ARM 64-bit architecture. This determines which architecture-specific code gets compiled.SUBARCH=arm64is used by some parts of the build system that check this separately fromARCH.CROSS_COMPILE=aarch64-linux-gnu-is the prefix for the cross-compilation toolchain binaries. The build system appends tool names to this prefix, so it findsaarch64-linux-gnu-ldfor the linker,aarch64-linux-gnu-objcopyfor binary manipulation, and so on.CC=clangtells the build system to use clang as the C compiler instead of GCC. LineageOS 22.2 builds this kernel with clang, so we match that.CLANG_TRIPLE=aarch64-linux-gnu-tells clang what target triple to use for cross-compilation. Clang is a cross-compiler by design (unlike GCC which needs a separate build per target), but it still needs to know the target.
These must be set in the same shell session where you run make. If you open a new terminal, re-export them. I learned this the hard way when my build kept failing because the variables were lost between terminal sessions.
Configure the kernel
Before building, we need to generate a .config file that tells the build system which features, drivers, and options to include in the kernel. The kernel has thousands of configuration options, and getting them right is critical - a wrong config can mean a missing driver, a kernel panic at boot, or a feature that does not work.
Instead of setting every option by hand, we start from a “defconfig” - a predefined configuration that the device maintainers have already tuned for this specific hardware. For the OnePlus 6/6T, the defconfig is called enchilada_defconfig (OnePlus 6 is codenamed “enchilada”, and the 6T “fajita” shares the same kernel config).
The O=out flag tells the build system to put all generated files in an out/ directory, keeping the source tree clean:
make O=out enchilada_defconfigIf you want to change specific config options on top of the defconfig (for example, enabling kernel address sanitizer, adding debug features, or disabling a driver), you can use the scripts/config tool:
scripts/config --file out/.config --enable CONFIG_SOME_OPTIONNOTE
In my case i had to
scripts/config --file out/.config --disable CONFIG_OEM_FORCE_DUMPbecause the LineageOS tree includes some OnePlus debug code that references an undefinedNETLINK_ADBconstant. The module itself is not needed for anything - it is an OEM crash dump tool that was never properly ported to this kernel tree
After making changes, resolve any dependency issues. The yes "" part auto-accepts default values for any new options introduced by your changes. Without it, the build system will prompt you interactively for every unresolved option:
yes "" | make O=out CC=clang CLANG_TRIPLE=aarch64-linux-gnu- oldconfigOne thing to watch out for: some config changes can cascade and silently disable other critical options. After running
oldconfig, always verify thatCONFIG_ARCH_QCOM=yis still present inout/.config. If it is gone, your config is broken and you should start over from theenchilada_defconfigstep.
Make your modifications
This is where you do whatever you actually wanted to do with the kernel. Edit the source files you care about. For my case, I was adding debug prints to the WLAN driver to trace a memory corruption bug.
The kernel has a built-in logging system accessed through printk. KERN_ERR is the log level - I use it for my debug prints because lower severity levels (like KERN_DEBUG) are often filtered out on production builds. You can read these messages later with dmesg:
printk(KERN_ERR "MY_DEBUG: variable=%d\n", variable);If you want to dump raw bytes (useful for inspecting buffer contents), this prints a hex dump with 16 bytes per line and ASCII representation on the right side:
print_hex_dump(KERN_ERR, "MY_DEBUG: ", DUMP_PREFIX_OFFSET,
               16, 1, buffer, length, true);
Build
Now compile the kernel. On my machine the full build takes about 15 minutes, but incremental builds (after changing a single file) take just seconds:
make O=out CC=clang CLANG_TRIPLE=aarch64-linux-gnu- -j$(nproc) \
    KCFLAGS="-gdwarf-4" \
    CFLAGS_curve25519.o="-Wno-frame-larger-than"
The two extra flags at the end deserve explanation because I spent time figuring out why they were needed:
KCFLAGS="-gdwarf-4"adds extra C flags to the kernel build. DWARF is the debug information format that compilers embed in object files so that debuggers and other tools can map machine code back to source lines. My system has clang 14, which defaults to DWARF 5, but theaarch64-linux-gnu-objdumpon my system is older and does not fully understand DWARF 5. This caused thousands of “Unrecognized form: 0x22” warnings during the build. Passing-gdwarf-4tells clang to emit DWARF version 4 instead, which objdump handles fine.CFLAGS_curve25519.o="-Wno-frame-larger-than"is a per-file compiler flag override. The wireguard module has a file calledcurve25519.cthat implements elliptic curve cryptography. Wireguard’s own Makefile hardcodes-Wframe-larger-than=2048, which means any function with a stack frame bigger than 2048 bytes is a compile error. Normally this is fine, but certain kernel features (like KASAN, the kernel address sanitizer) inflate stack frame sizes significantly. I found this by reading the build error, then grepping wireguard’s Makefile to find where the limit was set. Rather than editing the source, this flag disables the check for just that one file.
When the build succeeds, you should see CAT arch/arm64/boot/Image.gz-dtb in the output. That file (out/arch/arm64/boot/Image.gz-dtb) is your compiled kernel with the device tree appended.
Repack the boot image
We now have a compiled kernel, but we cannot flash it directly. Android devices expect a boot image in a specific format that bundles the kernel together with a ramdisk, a command line string, and various memory offsets that the bootloader uses to load everything into the right place.
This is where mkbootimg.py comes in. Earlier we cloned the AOSP boot image tools and used unpack_bootimg.py to extract the components from our Magisk boot image. Now we use mkbootimg.py to do the reverse: take our new kernel and the Magisk ramdisk and pack them into a flashable boot image. The values we pass (offsets, page size, OS version, command line) must match what the bootloader expects - we got these from the unpack_bootimg.py output when we unpacked the Magisk boot image(ref: Unpack the Magisk boot image):
python3 ../mkbootimg_tools/mkbootimg.py \
    --kernel out/arch/arm64/boot/Image.gz-dtb \
    --ramdisk magisk_boot_unpacked/ramdisk \
    --kernel_offset 0x00008000 \
    --ramdisk_offset 0x01000000 \
    --tags_offset 0x00000100 \
    --pagesize 4096 \
    --os_version 15.0.0 \
    --os_patch_level 2026-03 \
    --header_version 1 \
    --cmdline "androidboot.configfs=true androidboot.hardware=qcom androidboot.usbcontroller=a600000.dwc3 ehci-hcd.park=3 firmware_class.path=/vendor/firmware_mnt/image loop.max_part=7 lpm_levels.sleep_disabled=1 msm_rtb.filter=0x237 service_locator.enable=1 swiotlb=2048" \
    --output custom_boot.img
Flash
Now, for the moment of truth, hold your breath and reboot into the bootloader and flash the image to the correct slot.
Remember that LineageOS installed to slot B, so we flash to boot_b. If your setup uses a different slot, check with adb shell getprop ro.boot.slot_suffix:
adb reboot bootloader
fastboot flash boot_b custom_boot.img
fastboot reboot
(lowkey moonlander keyboard flex :D)
Verify and read output
After the phone boots, confirm your custom kernel is running. The version string should differ from the stock LineageOS kernel - look for a different build timestamp or commit hash:
adb shell cat /proc/versionThen read your debug prints:
adb shell su -c "dmesg | grep MY_DEBUG"The edit-build-flash cycle
Once everything is set up, iterating is fast. The whole cycle from editing a source file to reading dmesg output on the device is under a minute:
# 1. Edit source
vim drivers/staging/qcacld-3.0/core/path/to/your_file_goes_here.c

# 2. Rebuild (incremental, only recompiles what changed)
make O=out CC=clang CLANG_TRIPLE=aarch64-linux-gnu- -j$(nproc) \
    KCFLAGS="-gdwarf-4" CFLAGS_curve25519.o="-Wno-frame-larger-than"

# 3. Repack boot image
python3 ../mkbootimg_tools/mkbootimg.py \
    --kernel out/arch/arm64/boot/Image.gz-dtb \
    --ramdisk magisk_boot_unpacked/ramdisk \
    --kernel_offset 0x00008000 --ramdisk_offset 0x01000000 \
    --tags_offset 0x00000100 --pagesize 4096 \
    --os_version 15.0.0 --os_patch_level 2026-03 --header_version 1 \
    --cmdline "androidboot.configfs=true androidboot.hardware=qcom androidboot.usbcontroller=a600000.dwc3 ehci-hcd.park=3 firmware_class.path=/vendor/firmware_mnt/image loop.max_part=7 lpm_levels.sleep_disabled=1 msm_rtb.filter=0x237 service_locator.enable=1 swiotlb=2048" \
    --output custom_boot.img

# 4. Flash and reboot
adb reboot bootloader && fastboot flash boot_b custom_boot.img && fastboot reboot
Rolling back
If your custom kernel causes a bootloop or something breaks, recovery is simple. Get into fastboot mode (hold Volume Down + Power if the phone is off, or wait for it to loop back to the bootloader) and flash the Magisk-patched stock kernel:
fastboot flash boot_b magisk_boot.img
fastboot reboot
This restores the working rooted LineageOS kernel. You can also flash the unrooted stock kernel by using the boot.img you downloaded from the LineageOS site instead of the Magisk-patched one.